Thursday, 13 January 2011

NEW: Sparkling Sugar Crystals

NEW: Sparkling Sugar Crystals
 
50g tub of individual sugar crystals with a semi-translucent, pearlescent or metallic finish just like a real crystals and gems! Excellent for sprinkling on cupcakes, desserts or for use in sugarcraft however you may see suitable.
 
click here to see the full range

Wednesday, 17 November 2010

Snowman Cupcakes


These wintry snowman cupcakes are great for a festive celebration. They're easy and fun to make, perfect for beginners or anyone wanting to get the kids involved in a little baking this Christmas.


You'll need:
Cupcakes
Butter Icing or Frosting
Palette Knife
White Sugarpaste
Black Paste Colour
Orange Paste Colour
Red Paste Colour
Large Circle Cutter (50-60mm diameter)
Edible Glue
Brush
Marzipan Knife


All of the above equipment can be brought from our cake decorating and sugarcraft online store.


Mix up some frosting or butter icing (we're using our own American Style Chocolate Frosting.) If you're making your own butter icing why not try our butter icing recipe.


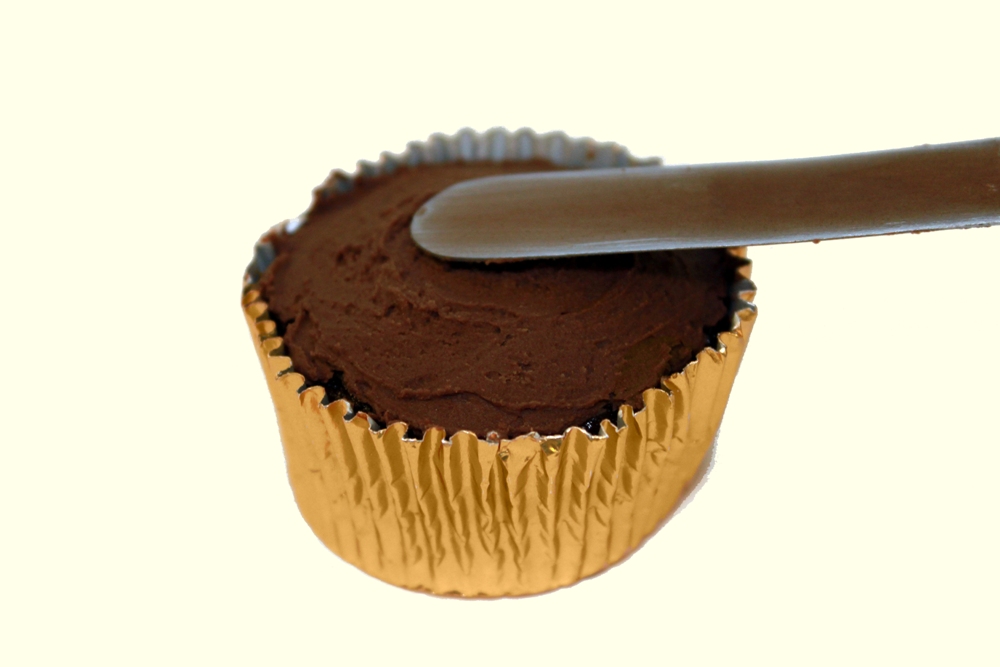
Spread a thin layer of the frosting or butter icing over your cupcake with a flat blade palette knife.


Next we need to cover the cupcake in white sugarpaste for the snow of the snowman. They'll be quite a lot of sugarpaste on the cupcake so we're using Almond Art Sugarpaste which has a slightly vanilla flavour. Use a circle cutter and cut out a circle of sugarpaste approximately ½cm thick and roughly the size of your cupcake (this is generally around 50-60mm in diameter. We're using the largest circle cutter from the FMM Geometrical Cutter Set)


Place the disc of sugarpaste on top of your frosting/butter-ice and press the edges down to completely cover your cupcake. If you're using chocolate or a bright coloured frosting be careful not to get any on your cupcake top as it will easily mark. 


Colour some white sugarpaste with liquorice paste colour and roll it into a ball (about the size of a cherry.) Divide the ball into 2 pieces, one slightly larger than the other. Mould the larger piece into an oblong, roughly the width of a stamp. With the other piece roll it in to a sausage half the width and slightly longer than the other. Press the two pieces together and arch slightly to create your snowman hat.


Every snowman needs a carrot nose, take a small ball of sugarpaste coloured with tangerine paste colour (slightly larger than a pea.) Roll it in your hands until it is smooth and crack free. Using your finger roll the ball off centre, the ball will change into a teardrop, continue to roll until your left with a cone as shown above.


Mix up some red sugarpaste using christmas red paste colour for your snowman's scarf, roll thinly and cut a strip approximately ½cm wide and slightly shorter than the width of your cupcake. Now cut a second strip the same width but only about half the width of the other. Place the shorter piece at 90 degrees to the other as shown above. Add detailing to the scarf if you want.


Next your snowman needs some eyes and a mouth. Roll some small balls of black sugarpaste, you'll need 7 balls in graduated sizes. Alternatively you could pipe the eyes and mouth on using black icing.


Next you need to assemble your snowman cupcake. Using some edible glue stick the scarf onto your cupcake. Then line the hat up and glue in the position shown above (the hat should hang over the edge slightly.) Next glue the eyes, mouth and then nose onto your snowman.

If you're making lots of snowman cupcakes you could try making each one unique. Changing the number of balls used to make the mouth will alter the snowman's expression. e.g. only using 1 larger ball for the snowman's mouth will make him look like he's shocked or surprised. You could even try altering scarf colours, hat designs or even adding a sprig of holly. In fact why stop at snowmen? You could make a whole host of Christmas characters using the same ideas.

Time saving tip: You could use pre-coloured regalice instead of colouring white sugarpaste yourself.

Tuesday, 16 November 2010

Easy Butter Icing Recipe


A popular and well known icing that is quickly made, using half the weight of butter to icing sugar. The flavour and colour may be altered by adding different flavourings and colours.


1) Place the butter in a bowl. Using a wooden spoon or an electric mixer, beat until light and fluffy.

2) Stir in the icing sugar, milk and vanilla extract until evenly mixed. Then beat the icing well until light and smooth.

Flavourings: Replace the milk and vanilla extract with orange, lemon or lime juice and 2 tsp finely grated orange, lemon or lime zest. Alternatively you could add 1 tbsp of cocoa powder blended with 1 tbsp of boiling water.

Colourings: We recommend using a paste colour as it won't alter the consistency of the icing. Dust or liquid colours can be used but you may need to add more or less icing sugar to keep the same consistency.

To note: Strong or pure vanilla extract can alter the colour of your butter icing.

Friday, 22 October 2010

NEW: Chocolate Flavour American Style Frosting - 700g

American style frosting, perfect for cupcake toppings. Can also be used for filling cakes.

Delicious, smooth, creamy frosting free from artificial flavours and colours.
Use straight from the pot, spread or piped and can also be whipped to create a lighter frosting.

More flavours coming soon.

Wednesday, 13 October 2010

12 Steps To The Perfect Cake Covering


1. Find what works for you

You're unique, what you like others might not, from your taste in music, clothes, food to cars, holidays and much more. The same applies to sugarpaste, each brand is slightly different. It’s important you find a brand you like and can work with.

2. Temperature, temperature, temperature
Sugarpaste is basically glucose and icing sugar, therefore for better or worse it’s consistency is dictated by temperature. Sugarpaste that’s too hot will be sticky, leave marks and not hold its shape well. On the other hand sugarpaste that is too cold will be hard, difficult to work with and can crumble and tear. So it’s important you learn to manage the temperature of your sugarpaste.
Large quantities of sugarpaste are best stored out of direct sunlight and in a cool, dry place. Then the day before you want to use it store it at room temperature.

3. Failing to prepare, is preparing to fail!
If covering a cake is all about obtaining and maintaining the correct working temperature you need to make sure your paste isn’t going to sit there getting too hot or cold while you get your things ready. So make sure you have everything you need at your disposal and you have enough room to work in.

4. Measure twice, cut once
When you think you’re ready to cover your cake, stop. Look at your cake more closely. Are there any special points you need to take into account? Things like sharp corners or odd bumps in novelty cakes can ruin the finish if you go in all guns blazing. Plan what you're going to do, where you need to be careful and after you’ve read the rest of this guide how your going to do it.

5. What you knead to know
Kneading your sugarpaste is all about getting heat into it. Use the heel of your hands to compress and push the sugarpaste away from you, then fold it back over itself, turn the sugarpaste and repeat. After a few kneads, fold the sugarpaste in on itself to create a flat top. If the top is stress and crack free, its ready to roll.

6. Rolling out the sugarpaste
Rolling out sugarpaste is an art in itself. To start, dust the working area with a light covering of icing sugar. If your rolling out coloured icing you need to use as little as possible, especially with black, red and dark blue. Using a non-stick rolling pin and gently roll the sugarpaste. After a few rolls turn the sugarpaste round 90°, DO NOT turn it over. Continue to roll and turn the paste, check it can move freely from the table, if not, use some more icing sugar. Roll the paste to approximately 1cm/½inch thick. You should now be left with a rough circle of sugarpaste without any cracks or imperfections.

7. Avoiding air bubbles
Even the best decorators will get air bubbles in the paste from time to time. If you do, use a sharp knife or pin to burst the air bubble. Then use your finger to push out all the air from one end of the bubble to the other.

8. The big secret
I’ve been drumming into you that covering a cake is all about the temperature of the sugarpaste. Well I’m not about to stop now, although you got plenty of heat in the paste when you kneaded it most of this will now of dissipated and you’ll be left with constantly hardening paste. So the main secret for covering a cake is as follows. Using the palm of your hand, rub the surface of the sugarpaste. It should start to become shiny, do this until the whole surface is polished.

9. Covering the cake
You need to work quickly here to keep the heat in your sugarpaste. Fold the sugarpaste over your rolling pin and place on the cake polished side up (as you had it on the table). If the top of your cake is flat, use the rolling pin and gently roll the paste onto the top of the cake. This will remove any air bubbles.

10. Gently does it
Carefully hold the sugarpaste off of the edges of the cake. Then using your hand, in a cupped shape, gently push the paste against the cake in a controlled way, making sure you exclude any air. Once you’ve got it placed correctly cut off most of the excess (leave approximately 1cm.)

11. Repairing cracks
A sharp corner, drying paste, too much pressure. Cracks can appear in your sugarpaste for many different reasons. Even using all of the above techniques it still can happen from time to time. However there are ways of covering them up or even repairing them completely. Cracks are due to the paste being stretched too far. Most cracks can be repaired by simply rubbing around and moulding the sugarpaste together.

12. Smoother operator
You now need to smooth and polish the surface of the sugarpaste to perfection. Use a ‘smoother’ to achieve this finish, this will stop you leaving marks and finger prints in/on the paste. Once you’ve smoothed the cake, cut off the remaining excess paste, then using the straight edge of the smoother neaten up the cut.

Thursday, 7 October 2010

NEW: Cupcake/Muffin Tulip Wraps

Available in chocolate brown, white & caramel.
Make coffee shop style cupcakes and muffins using these great tulip cupcake/muffin cases.

Monday, 27 September 2010

NEW: Cupcake Cases!

New paper cupcake cases are now available to order from our website.
We've got a selection of colours in both 36pk or larger bulk packs of 180.
Colours include: Black, Chocolate, Orange, Yellow, Red, Pink, Green, Blue & Purple.


Pack of 36 only: £0.99
Pack of 180 only: £3.99

Tuesday, 21 September 2010

Christmas Shop Now Online

Our christmas shop is now online.

We've a whole range of festive decorations and supplies.
Add a special touch to your christmas cakes, cupcakes and other sugarcraft and baked goodies.

New christmas products include:


Tuesday, 3 August 2010

Number Sparkler Candles

Number sparkler candles 0-9 - Only 99p!
Add a sparkle to any cake with these superb number sparkler candles. 

Numbers approximately 65mm - 70mm high with 110mm pick

INDOOR FIREWORK
Non-hand-held sparklers, spent sparklers remain very hot.
WARNING: This device is not a toy; it must not be used by any children under the age of 18.